
For inquiries please click here
Order SeaDek for your boat
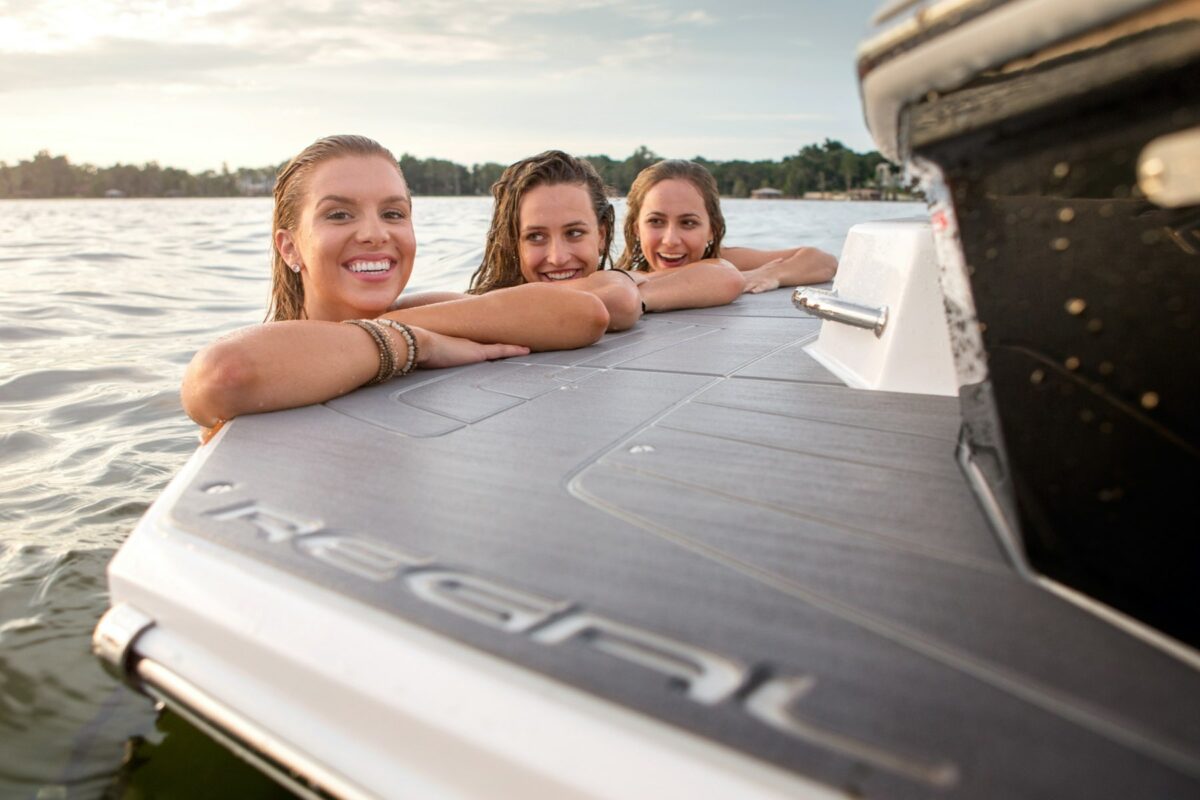
To process your order, we first need all the data of your boat in order to create a template.
We already have templates for most common boat types. If this is the case, we will send you a suitable deck plan (see drawing) on which the various individual parts are numbered.
Please note only the parts you wish to order for your boat. For example, if you would like to order the inboard platform with access, please note the parts 11-19 on the order form or, for the outboard platform, the parts 11-16, 19 and P1-P2.
Please use only our order form to place your order. Make sure to fill in all the information carefully to avoid unnecessary delays or misunderstandings.
After receiving your order, we will be happy to provide you with a customized quote. If you give us the go-ahead, we need about two weeks to produce the molded parts.
stencil production
If we do not have a template for your boat type, you will receive our template set for a fee (to be paid when the order is placed):
- Individual number of special stencil film (1 x 2 m)
- Stencil operating line
- Data sheet
Additionally required tools
- Thin, waterproof pen
- Crepe tape
- Scissors
- Camera/cell phone with camera
Manufacturing constraints
- The film must lie smoothly on the areas to be covered.
- Draw as accurately as possible.
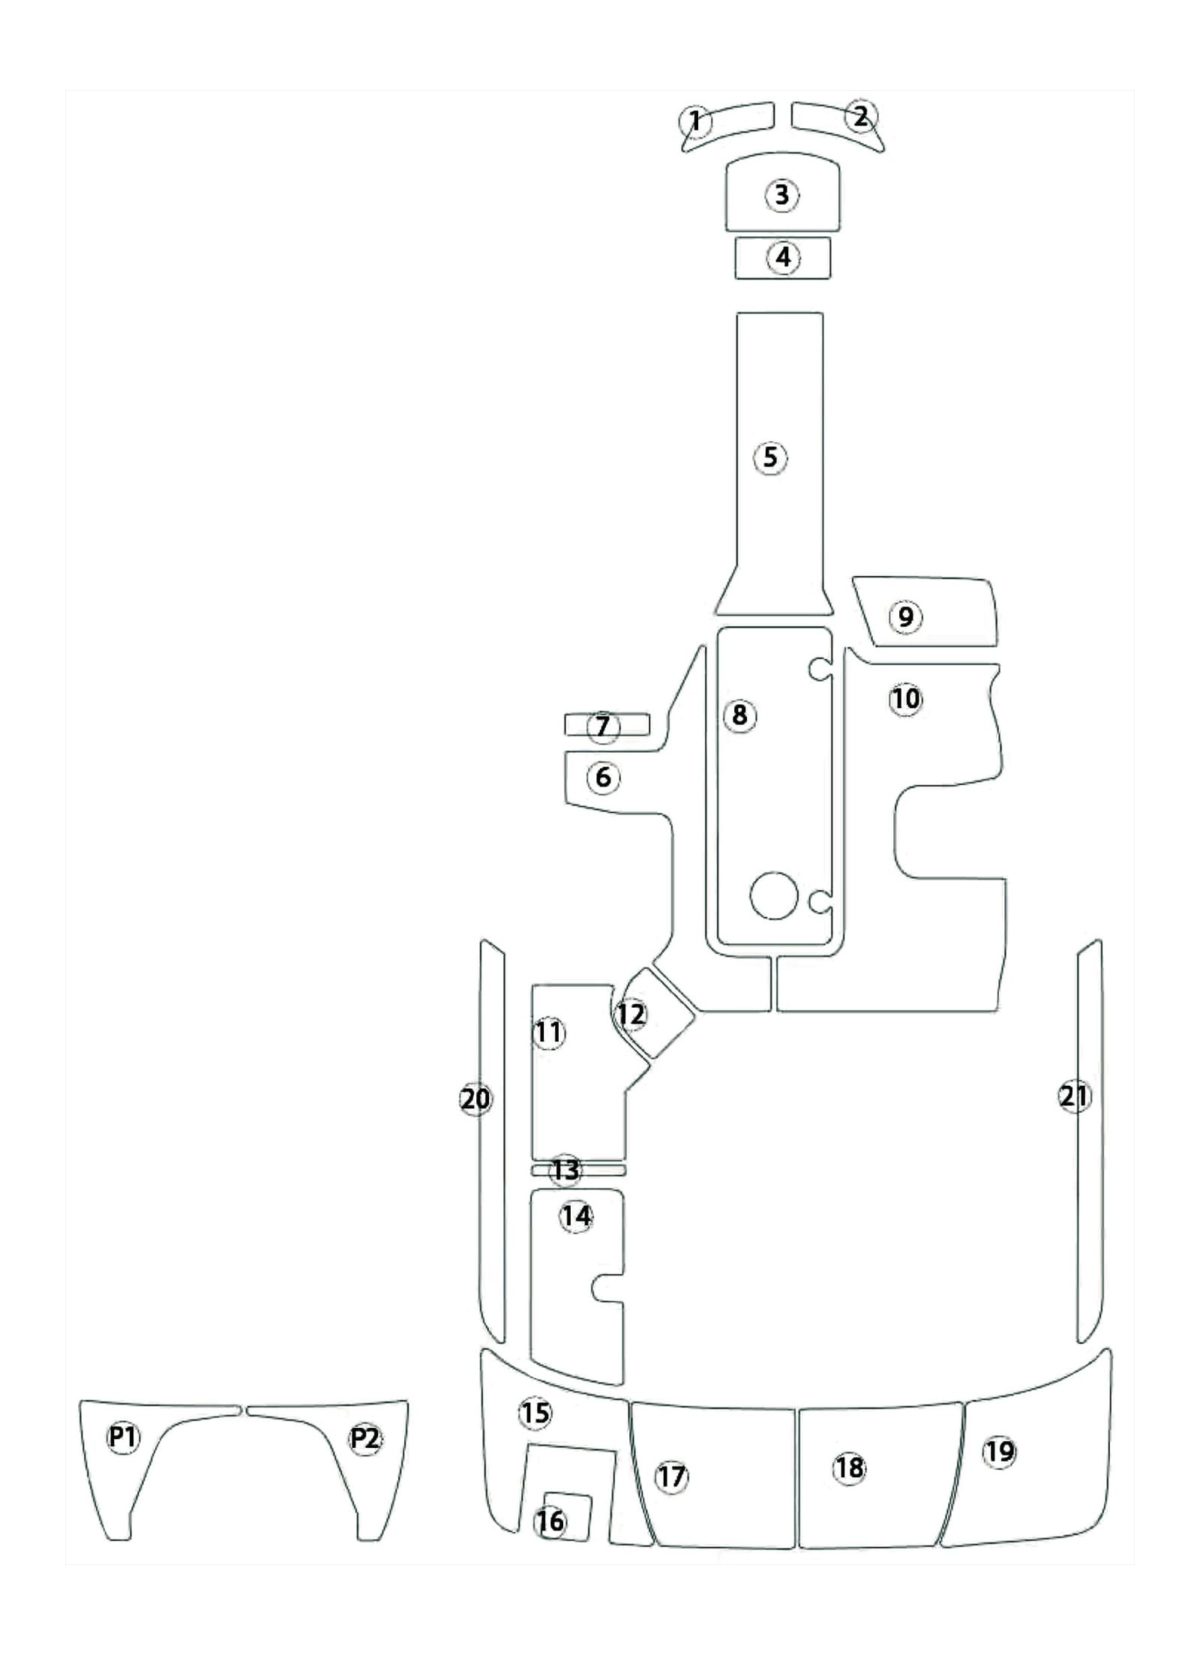
- Please do not stick several slides together. If necessary, connect the slides with symmetrical lines.
- Boats are usually not exactly symmetrical. Please do not use mirrored slides for this reason.
- The film must be clean.
- The finished SeaDek® product is a maximum of 0.98 meters wide by 1.98 meters long. If you have a part that is larger than our dimensions, please draw a suggestion for a cut.
Preparation & drawing
Lay out the film everywhere where SeaDek® is to be glued later. You can cut the film to size to lay it out smoothly and precisely.
Fix the film with masking tape so that it cannot move.
Use a thin permanent marker to draw around the outer contours of all the areas to be covered. It is best to use the nonskid (ribbed or sanded surface) as a guide. Also draw in all the lids, hinges and openers.
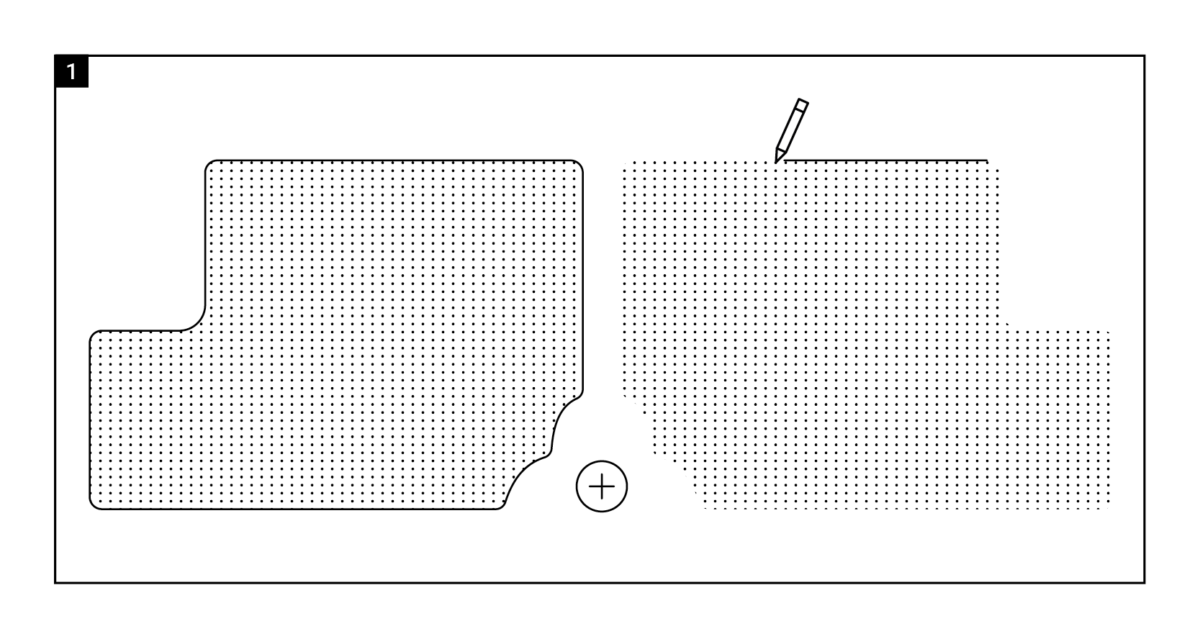
Allow us a small amount of excess (e.g. 3 mm). We will mark your templates exactly and later expand them by the amount of excess you have specified, in order to cover all areas well and avoid “flashes”. For cut-outs, please indicate the excess with an arrow in the respective direction (see figure 2).
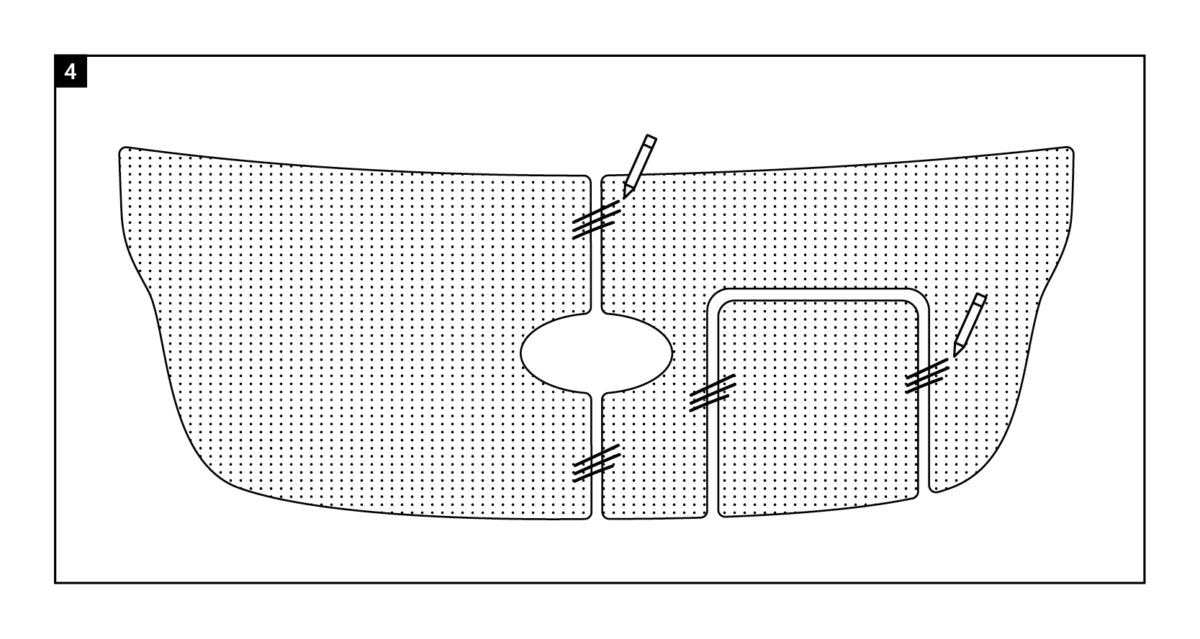
In order to create the Teak Faux symmetrically on all pads, we need to know the position of the foils in relation to each other. The best way to do this is to draw several straight lines from one foil to the other, thus creating relationships (see picture 4).
Label each individual foil. Customer name, boat, type, year of construction, top side, bow, port, starboard, consecutive numbering.
Dokumentieren
Take photos of the templates on the boat. Send these photos to us at seadek@seadek.de. Detailed photos are very important, as is an overall view. This will make our work much easier.
Clean any dirt off the film. Roll up the film and send it to us together with the completed data sheet.
Good luck!
Please click here to order
Plot-Folie kontrollieren
To control your slides, please follow the instructions:
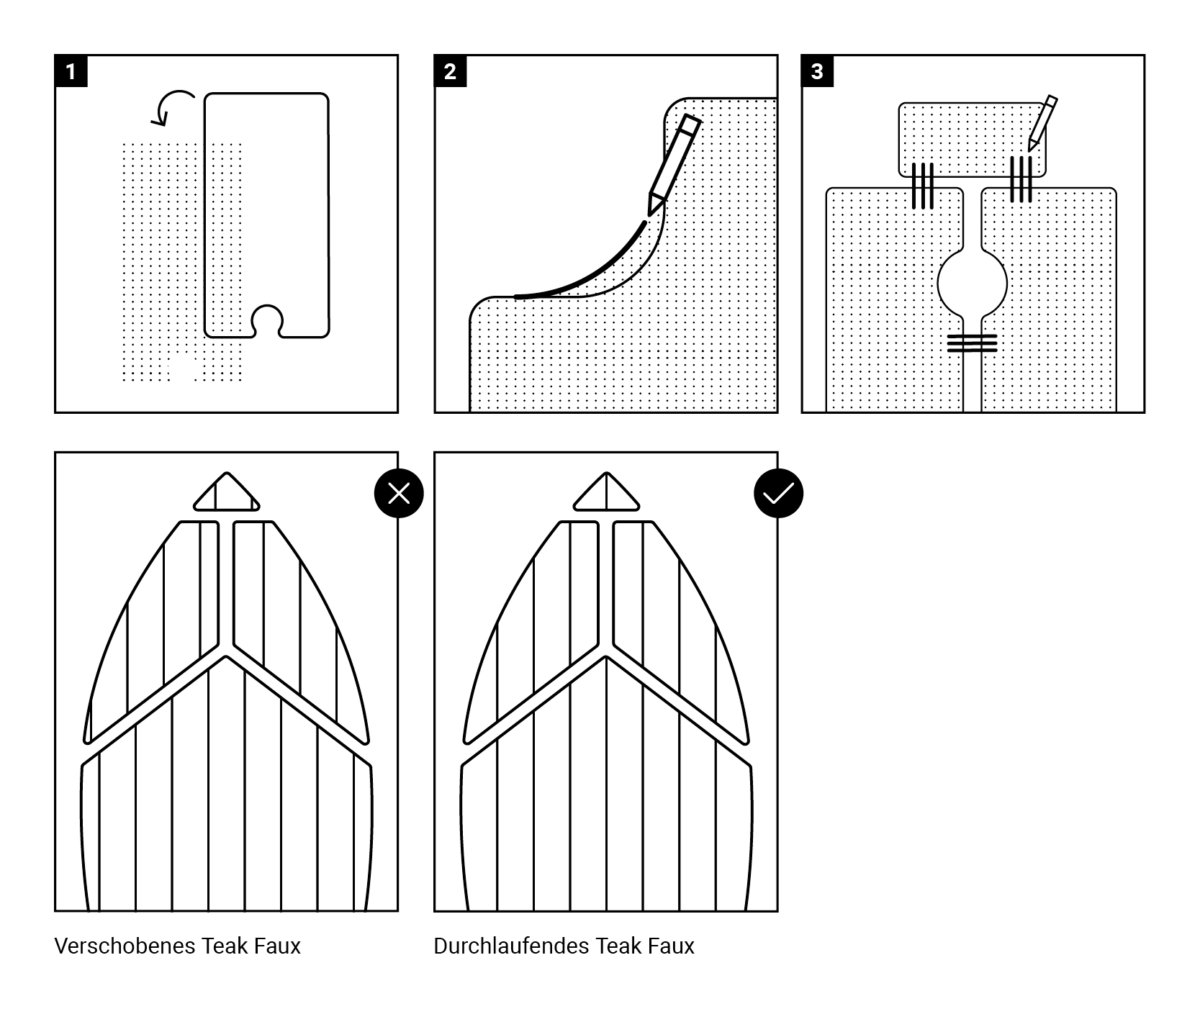
- Cut out the slides with a protruding edge of about 2 cm, fix them on the boat and compare (picture 1).
- If necessary, use a different color pen to draw in changes (Fig. 2).
- Draw connecting lines on the slides for positioning (Fig. 3).
To ensure that the teak faux runs consistently and in a straight line from bow to stern (see sketch on the right), the individual foils must be connected to each other.
Draw straight lines from foil to foil. This is how you create connection points that we use for orientation when drawing (picture 3).
Is the plot drawing a few millimeters larger all the way around than your non-skid? No problem. This excess is intentional. This is how we ensure that SeaDek® really does cover all areas.
SeaDek Installation
With a 3M™ acrylic-based adhesive and the highest adhesive formula, SeaDek® is permanently adhesive. The ready-to-install self-adhesive makes SeaDek® easy to apply and requires no mounting hardware.
Download SeaDek installation guide
PS: Show us the end result. We look forward to receiving your personal SeaDek® photos!
Please click here to order